How to add a new staff?
Here's a step-by-step guide to adding a new staff to your salon software.
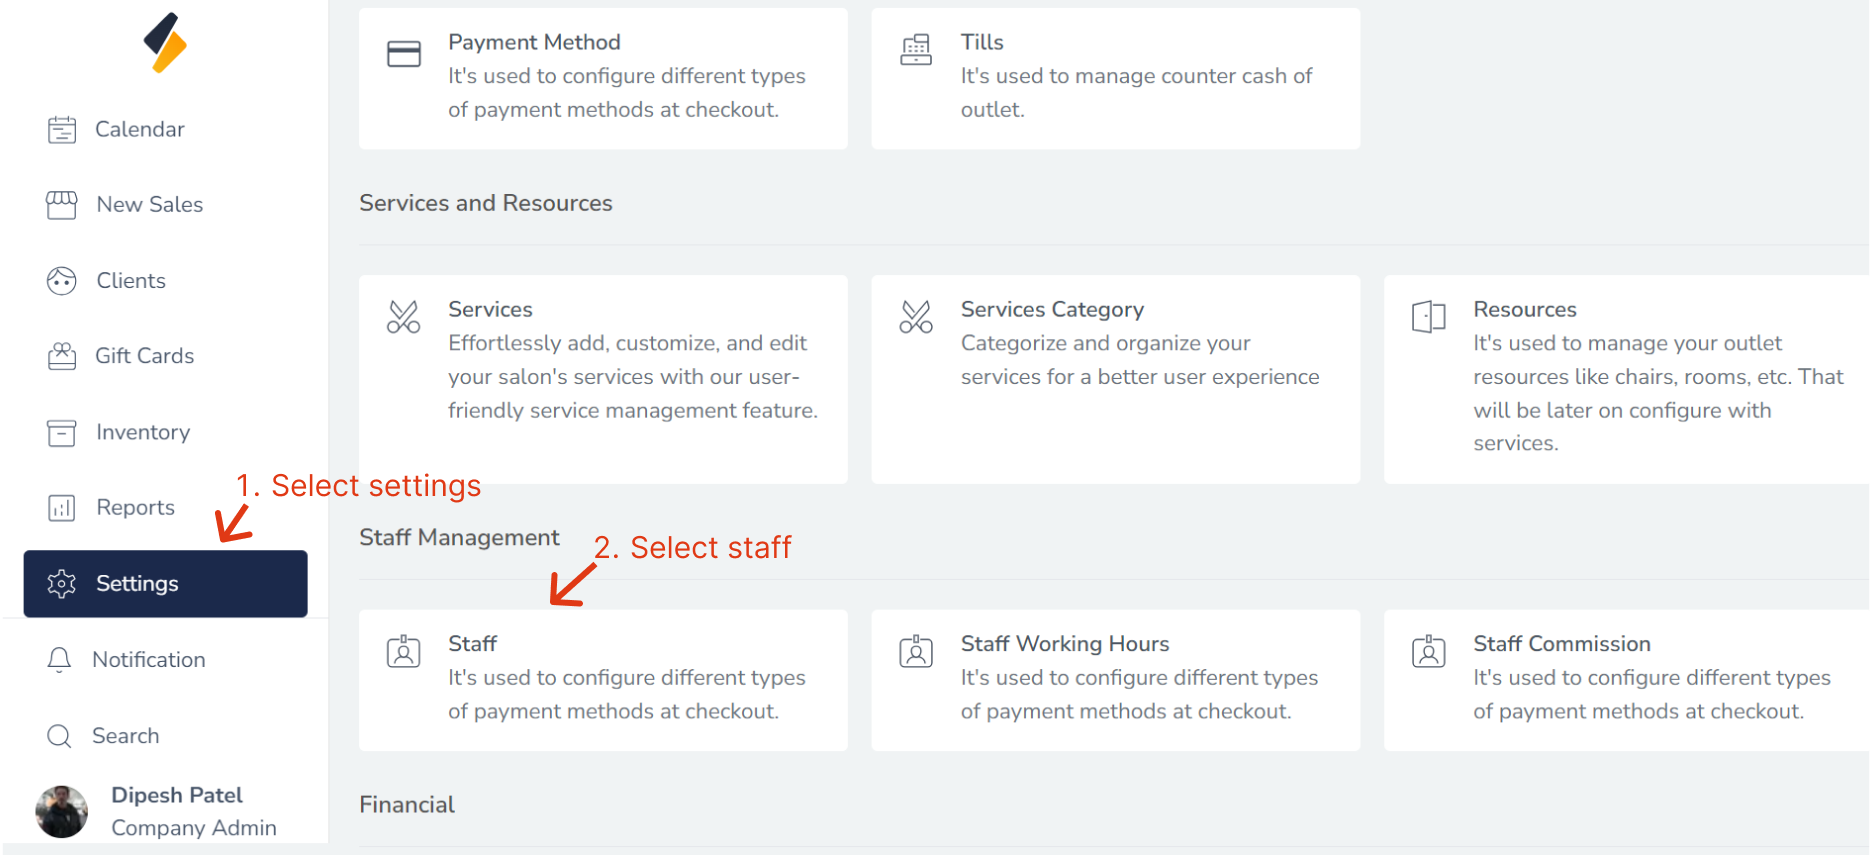
1. Navigate to the Staff Option:
- Once you have logged in, Select the Settings option from the sidebar.
- Click on Staff option from Staff management.
2. Add a New staff:
Click on the "+Add" button to add a new staff to the list.

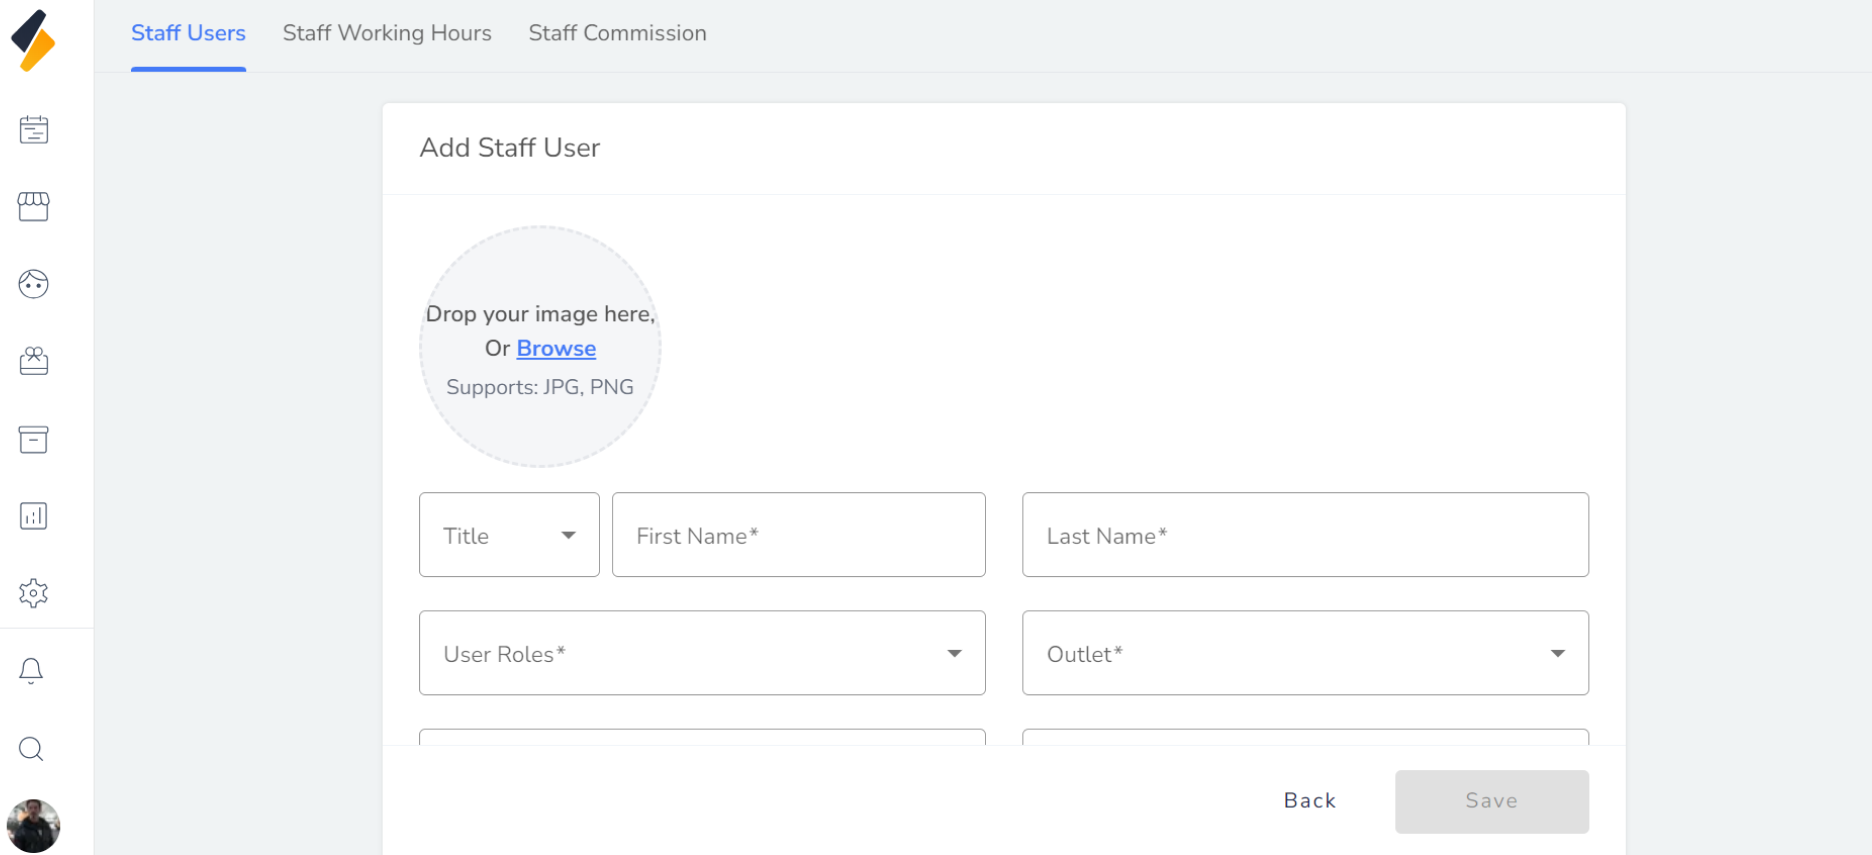
3. Fill in the necessary staff details:
Enter all the required details such as staff name, roles, Outlet.
-
Upload Profile : This field is used to upload user profile photo.
-
FirstName: This field is used to input the user's first name.
-
LastName: This field is used to input the user's last name
-
User Roles: This field is used to select the user's role(s) within the salon system such like Staff, Receptionist, manager or Company Admin.
-
Outlet: This field is used to select the user's outlet or location of salon, if applicable.
-
Designation: This field is used to input the user's job title or designation.
-
Gender: This field is used to select the user's gender, if desired.
-
Email: This field is used to input the user's email address.
-
Phone No: This field is used to input the user's phone number.
-
Period Of Employment: This field is used to input the user's period of employment or contract duration, if applicable
-
Commission: This field is used to input the user's commission rate or percentage, if applicable.
-
Address: This field is used to input the user's postal or physical address.
-
Resource Color: This field is used to select a color to represent the user or their activities in a visual interface or calendar.
-
Allow Calendar Booking:(Active/Inactive) This field is used to activate or deactivate the user's ability to receive bookings through a calendar feature.
-
Online Booking:(Active/Inactive) This field is used to activate or deactivate the user's ability to receive online bookings through a web or mobile interface.
-
Allow in Roster: (Active/Inactive) This field is used to activate or deactivate the user's visibility in a roster or schedule feature.
Make sure to double-check that all information is accurate and up-to-date.
5. Click on the "Save" button
Finally, click on the "Save" button to save the new staff along with all its details.
By following these steps, you can easily add a new staff to your list and manage it efficiently.
You can also set business hour of particular start from this Set Business Hour