How to add a new client?
Here's a step-by-step guide to adding a new client:
1. Navigate to the Client Section:
Once you have logged in, navigate to the client section of the software. This may be located under a Clients Menu.

2. Add a New Client:
Click the "+ Add" button to begin adding a new client to your system.

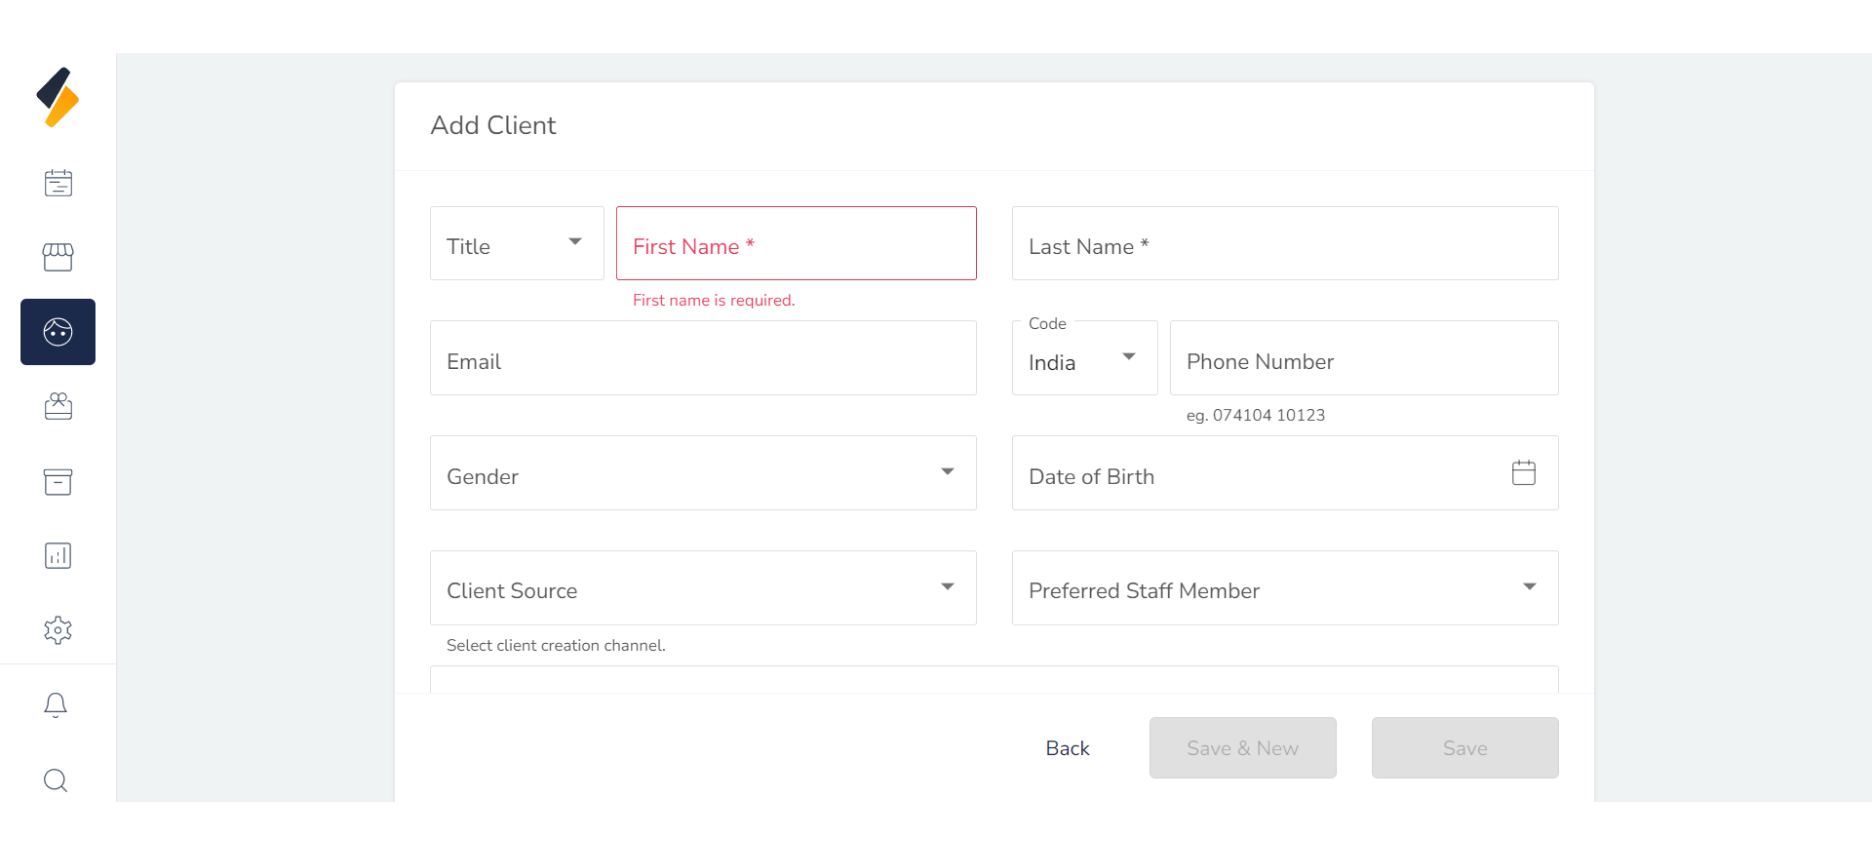
3. Enter the Client's Information:
Enter the client's information into the appropriate fields, including:
- Title, First and Last Name
2. Contact Information (Phone, Email)
3. Address
4. Client Source (select From App, Website, Facebook)
4. Birthday
5. Preferred Staff Member
5. Notes (e.g., preferences)
6. Contra Indication
7. Status
- [ ] Unreliable
- [x] Card Complete
- [x] Verified
- [ ] Loyality Member
- Account: In which add Account Balance and Loyality Point Balance
- Discount: Add Product Discount and Service Discount
- Notification Settings: Give the permission for Send sms or mail
- [x] WhatsApp
- [x] Email
 Make sure to double-check that all information is accurate and up-to-date.
4. Save the Client's Information :
Once you've entered all the client's information, click the "Save" button to save the new client to your system.
5. Confirm the Client's Addition:
After adding the new client, review their information and update any fields as necessary. For example, you may need to update their contact information or notes after their first appointment.
Adding new clients to your salon software is a simple process that can save you time and improve your salon's efficiency. By following these steps, you can ensure that all client information is accurate and up-to-date, which can help you provide better service and build stronger relationships with your clients.